

Painting on Objects; Marble, Crackle and Stencil
Allow me to introduce myself, my name is Luke and I work at the GreatArt Flagship Store.
I would like to share an opportunity I had recently.
Before I start though, here is a little information about my art background. I have always enjoyed painting and coating objects (mainly empty spray cans that I kept from painting murals and Graffiti). I have always experimented with many different techniques and found that some were more successful than others. I have experimented with all types of products available from the store including PVA glue, gold leaf and even sea glass found on the beach.
The main similarity though, is that I always start with a spray paint base and often this allows me to coat the object quickly, provide an opaque finish to cover anything unwanted on the original object and finally, the drying time is relatively quick. As I am impatient the drying time means I can start the fun process of embellishment or painting pretty quickly after applying the basecoat.
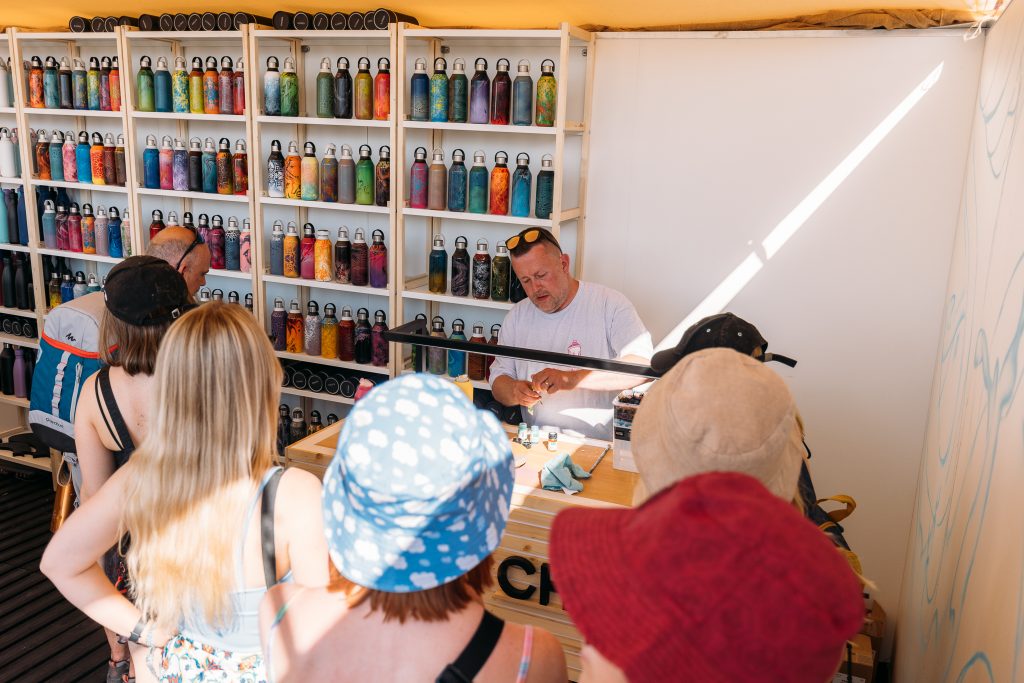
Anyway, back to the opportunity I wanted to share with you. I was recently approached by an agency who hired me to work with a leading water bottle brand who were running a pop-up stand at Glastonbury Festival. They wanted me to bring my techniques to display to customers on their water bottles and sell pre-made bottle at the stand too.
I took 200 pre-painted bottles and completed a further 100 for customers when I was there, giving demonstrations and taking orders.
I was incredibly overwhelmed by the response and had no idea just how well this going to go.
To be honest I didn’t expect to totally sell out!

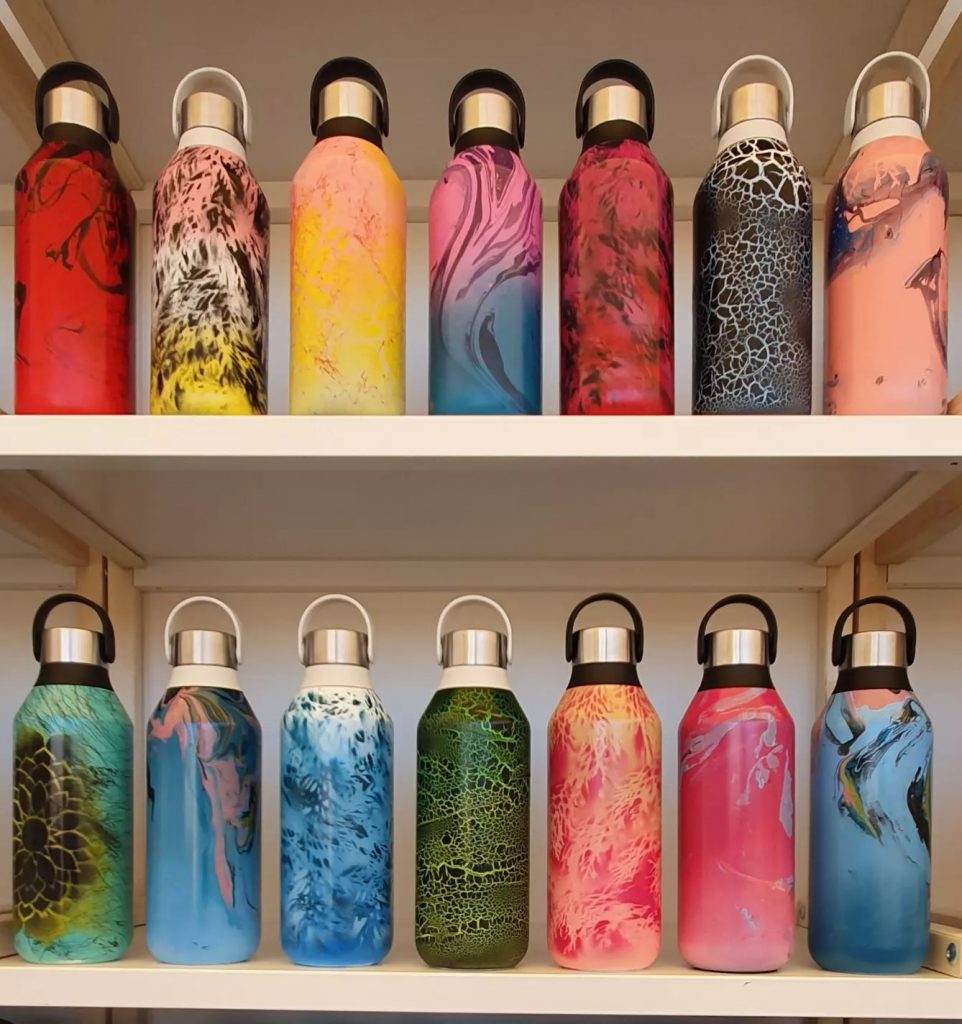
Let me tell you a little more about the processes and techniques I used to coat the bottles. I decided to use three techniques for this project they were; marbling, Crackle and stencil.
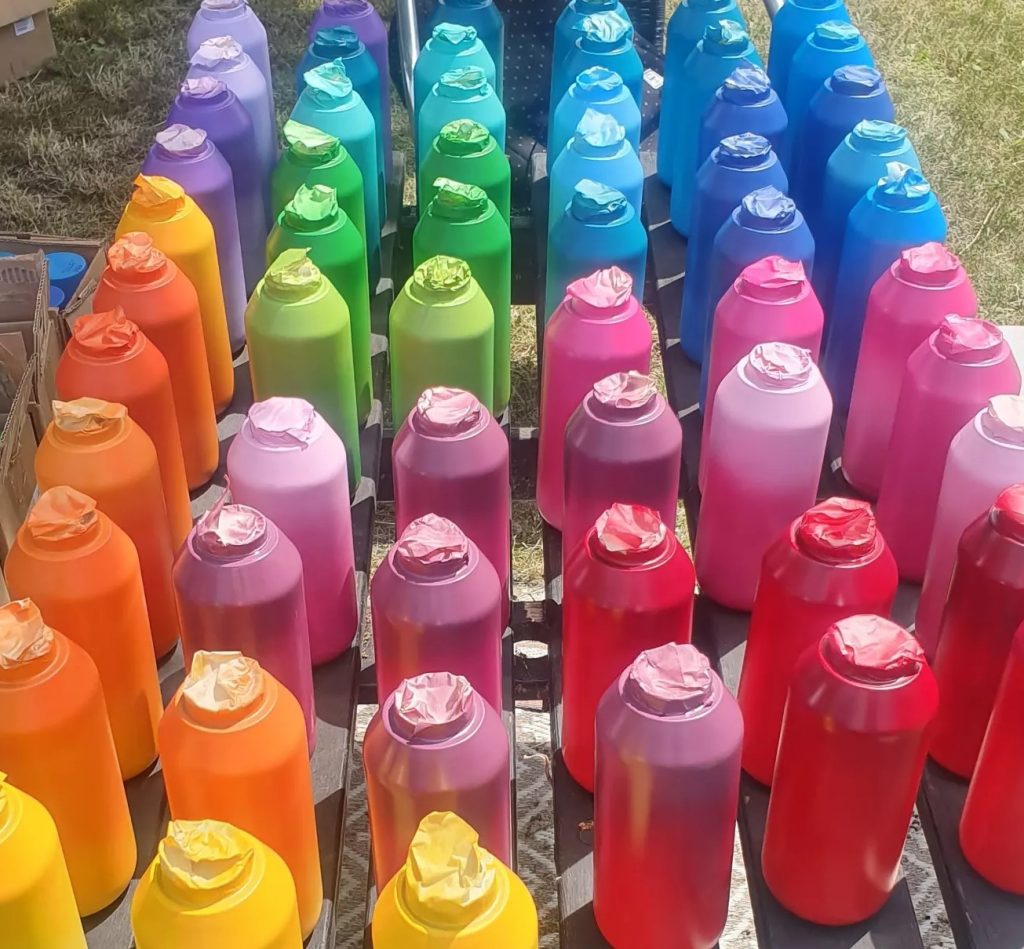
I started off my prepping my bottles by base-coating with spray paint first;
Preparation can often be time consuming but ensuring you do not rush this will achieve a much better result in the long run. This ensures you avoid drips and gives you the opportunity to think about the use of colour on the base. I always like to apply an ombre fade between two or more colours on the base. This is because the base colour will always be present even after all of the other techniques are applied.
The spray paint I use is Molotow Beloton Premium spray paint and is available either at the store in Shoreditch London or online at www.greatart.co.uk, I have provided a link below;
Molotow Belton Premium Spray Paints | 50,000+ Art Supplies | Your Art Superstore (greatart.co.uk)
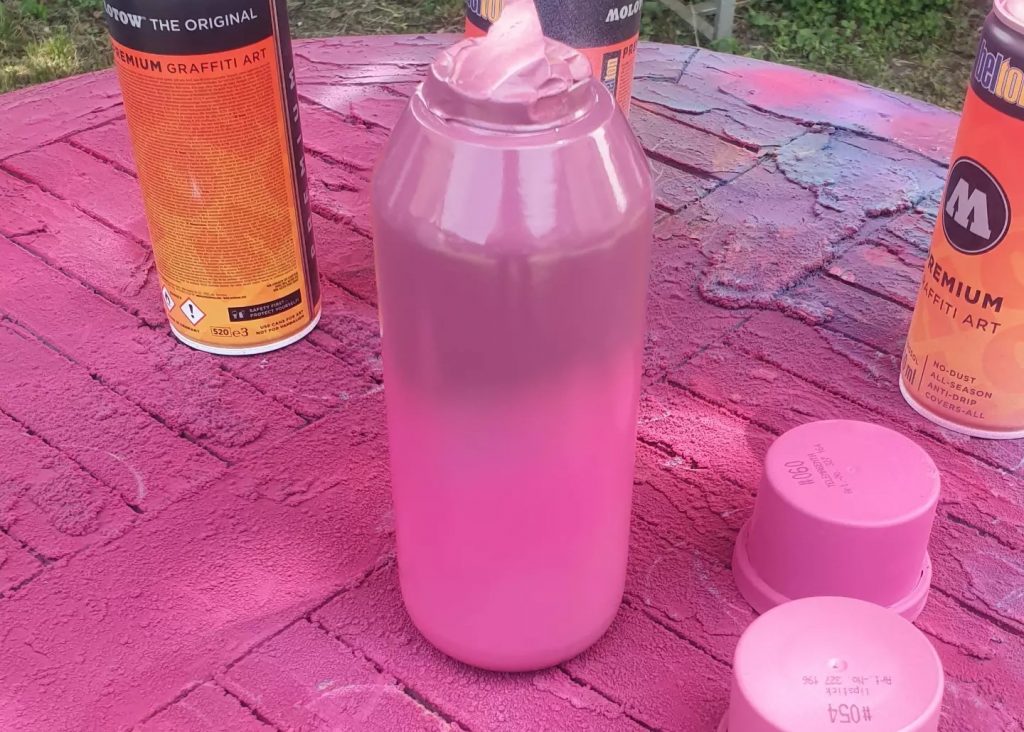
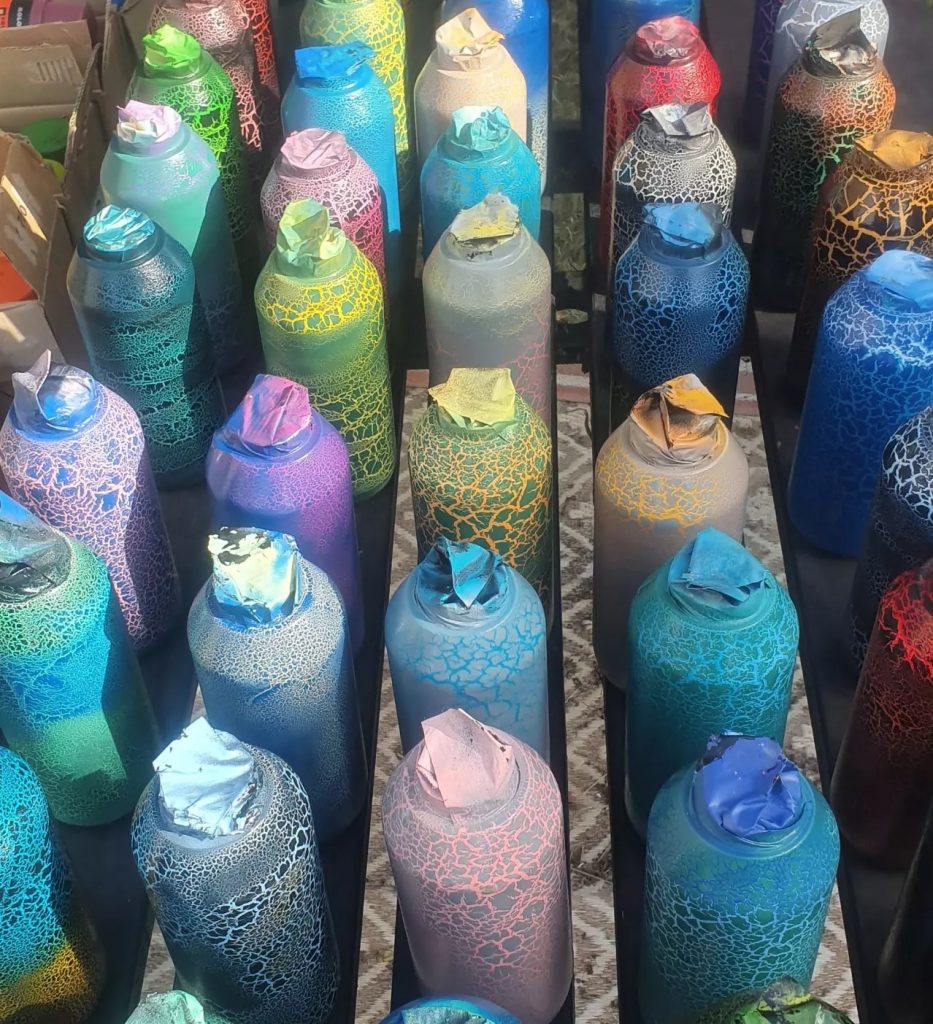
Here you can see the Base coat preparation

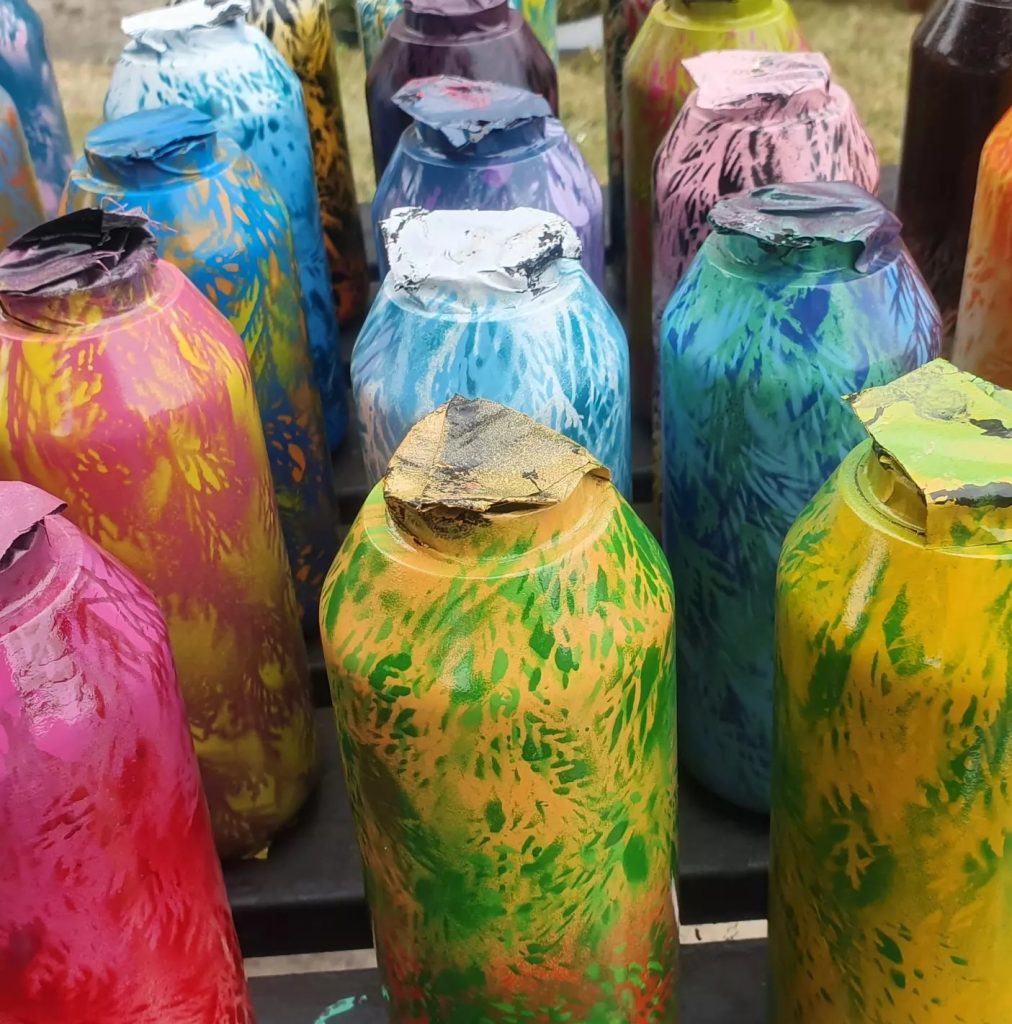
The first technique I used was stencilling. I used several different types of stencils including tile stencils and leaves. This is easy to achieve and very effective but the most important thing to remember is to let the basecoat dry fully first otherwise the stencil may stick or leave marks.
Simply place your stencil against the object and use spray paint over the top. You can apply as many layers as you like but always let each layer dry properly first.
It might be worth mentioning that you should use gloves and a mask as the spray paint is toxic as it contains solvents and acrylic particles can also be dangerous. If possible, always use spray paint outside or at least in a very well-ventilated area.
The best thing about stencilling is that you can use virtually anything from ripped paper to items found on the street or in your garden. You can also buy stencils directly from GreatArt, please see the link below;
Gelli Arts Motif Stencils | 50,000+ Art Supplies | Your Art Superstore (greatart.co.uk)
Please see some leaf stencilling in the image below in the preparation stages;
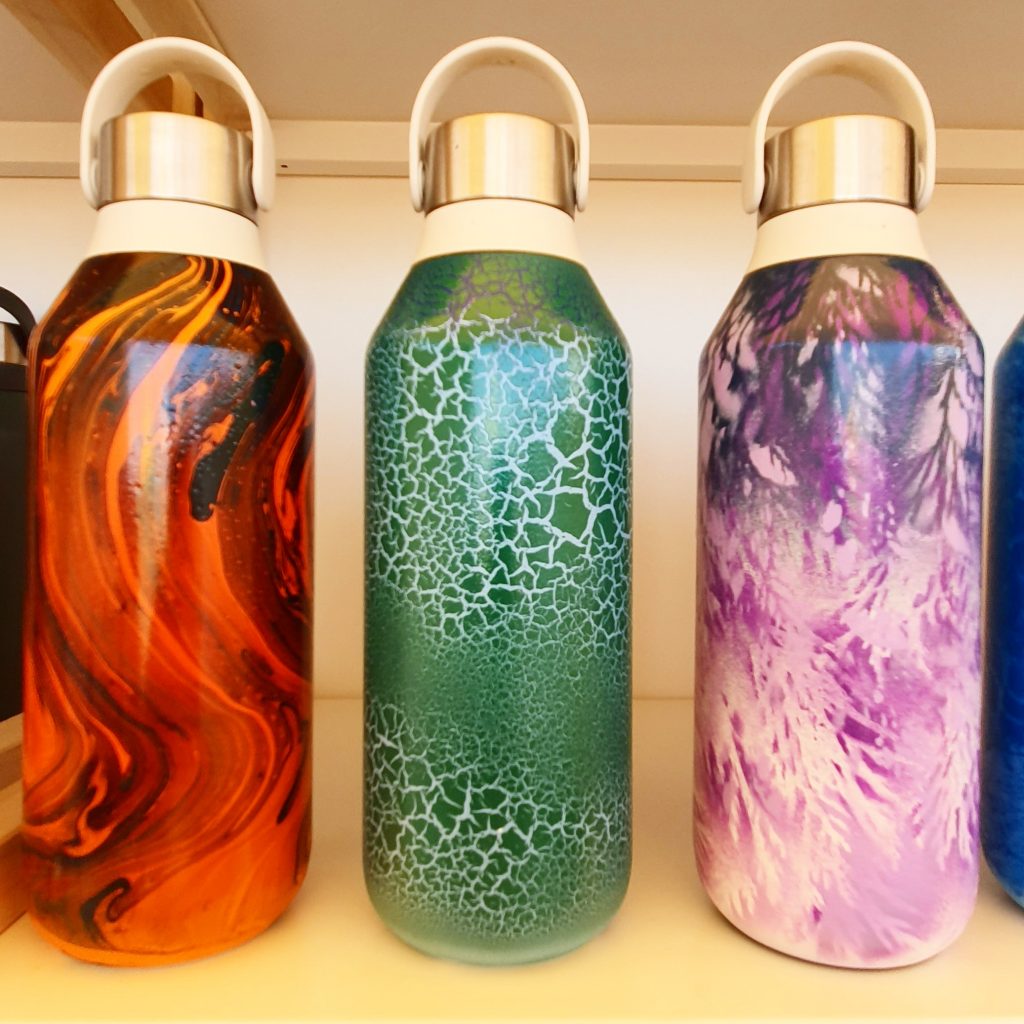
The next process I would like to discuss is Crackle;
This technique is so impressive and stunning but so easy to complete.
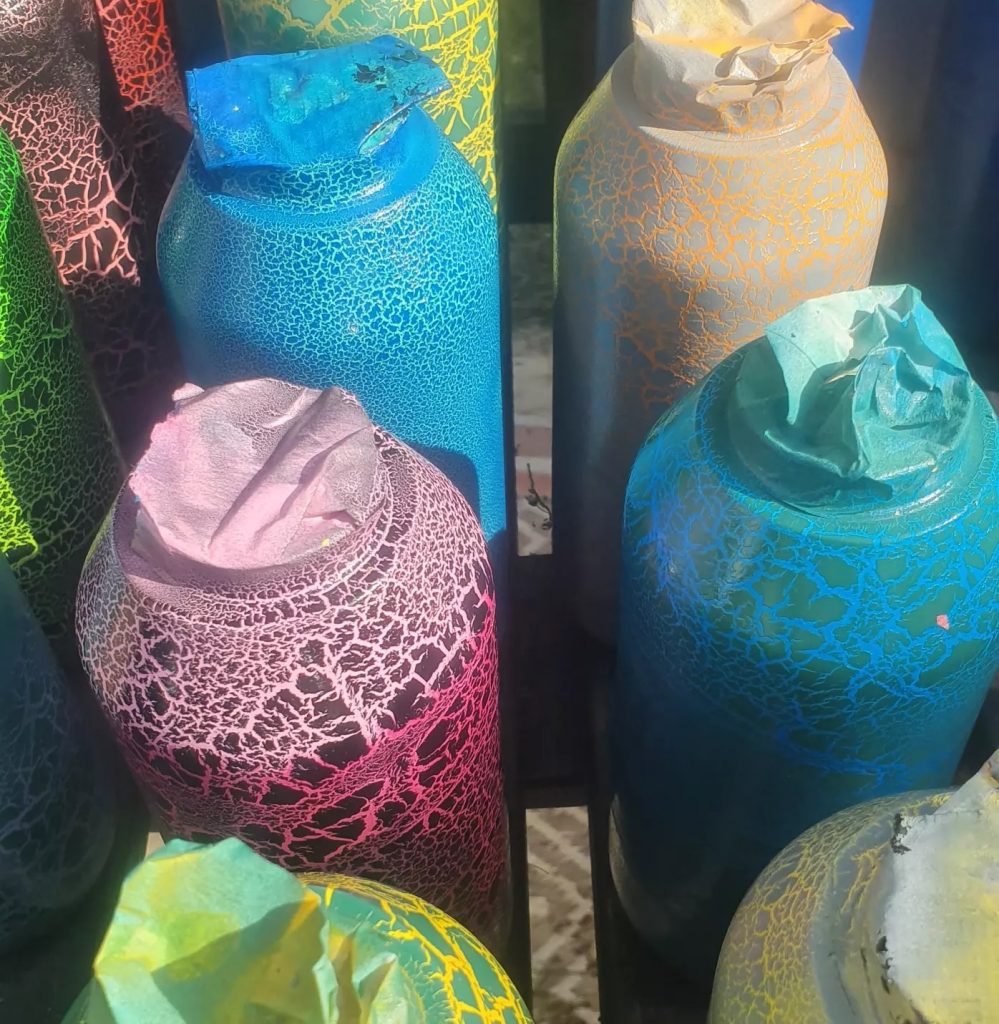
For this effect I simply take the primed object and use a Montana Crackle Effect spray paint to Cover the entirety of the object and let it work its magic.
It’s worth mentioning that out of all of the spray paints I have used, this is the smelliest, and possibly the most toxic, so please be careful. It also comes our extremely fast and uses a calligraphy cap which has a thin but wide flow. The smell can take a few days to evaporate from the freshly painted object.
This product is currently only available at the London Shoreditch Flagship Store. You can order this via calling 0300 303 4224.
What is fascinating about using this paint is that as soon as you have sprayed it on, you can see the crackles start to appear almost immediately however the full effect takes around 45 mins to really work, so it’s worth being patient with it.
The paint however, does seem to have a mind of its own. Depending on external factors such as, humidity, amount of sunshine and temperature, the size of the cracked areas do substantially differ in size. I have not yet found away to control this and it does seem like pot luck on how it cracks.
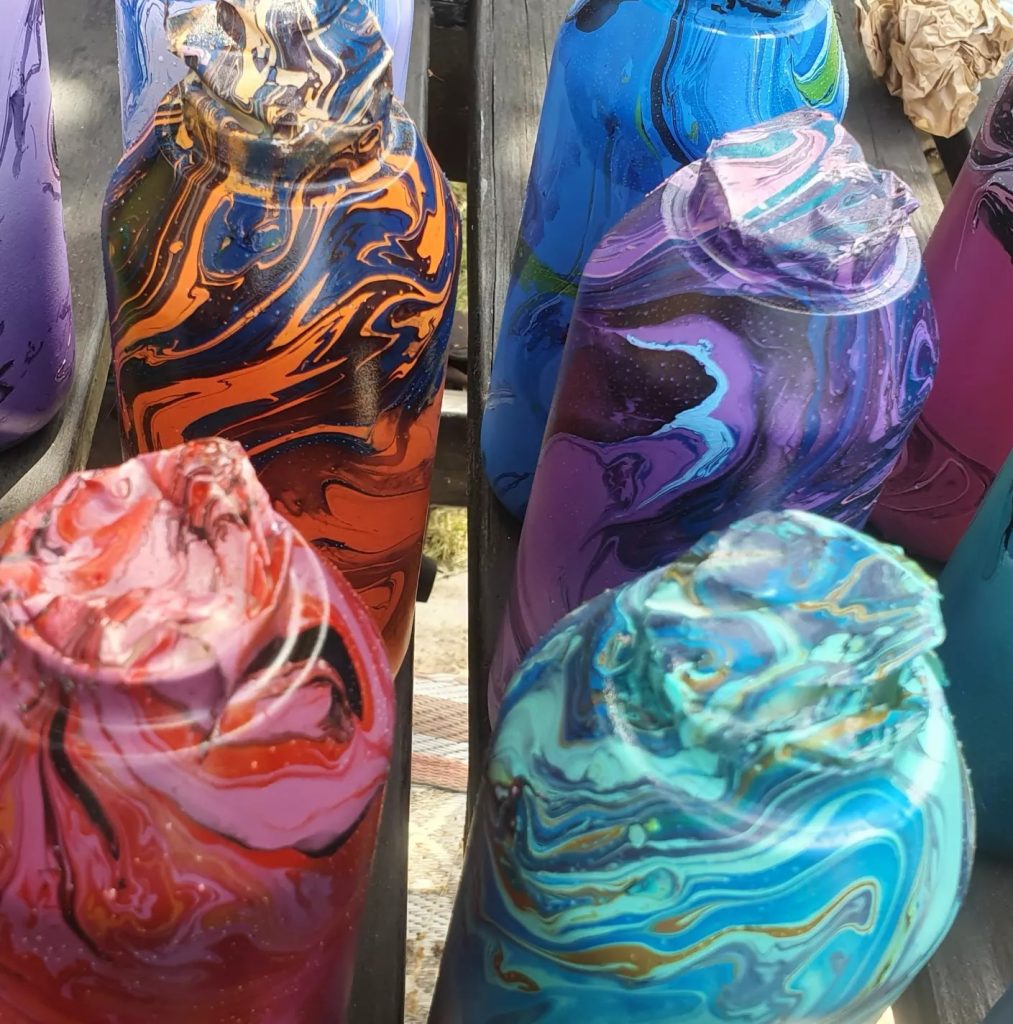
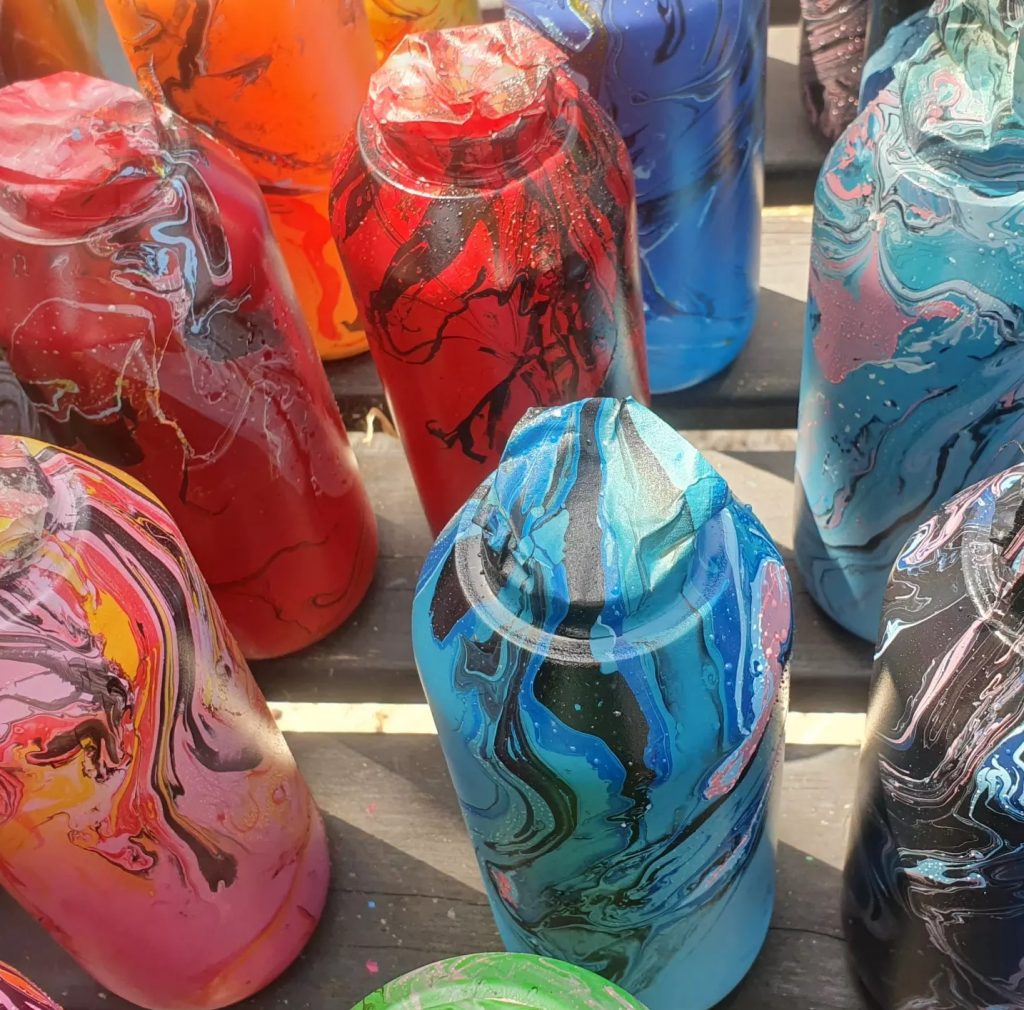
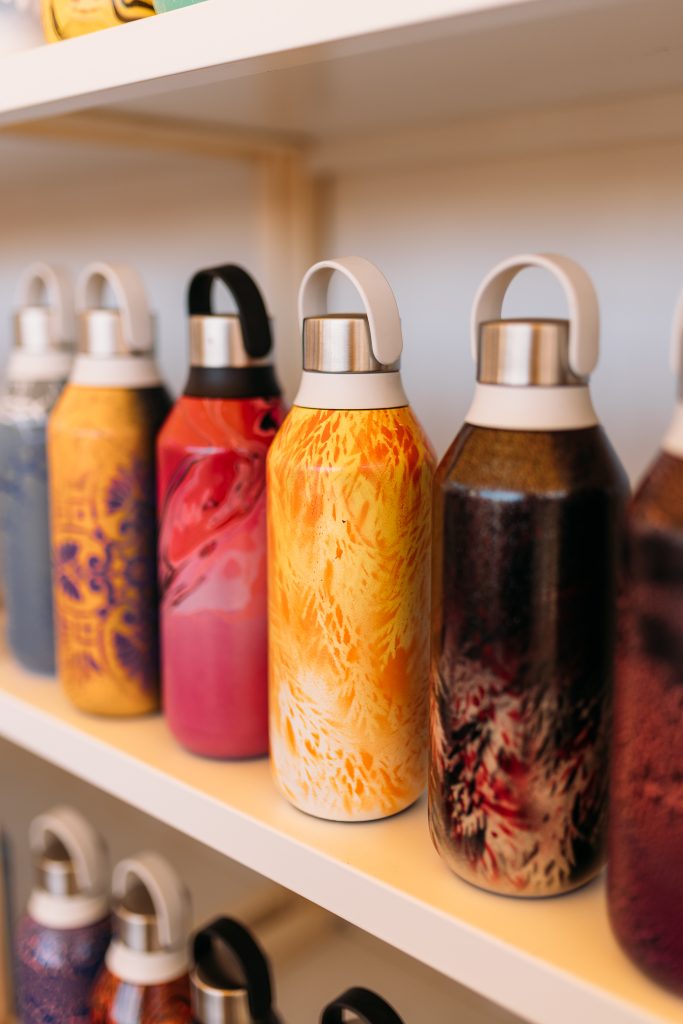
Now we are on to the final technique; Marbling.
To be honest this was by far the most popular and successful technique that I have used. Again, it is very easy to use and so much fun.
There are a few more bits and bobs you will need to ensure your success when marbling, these are;
- A suitably sized bucket or container to dip into, ensure you allow enough space for water displacement.
- A rod or stick to swirl the paint with.
- Latex gloves, to avoid contact with skin, this is a solvent-based product.
- A tray and wire rack to allow the drip dry of the object.
- A cloth to just to wipe up any spillages.
The marbling paint I use is from Marabu and you can shop for this either instore on online using the link below;
Marabu Easy Marble Marbling Paints | 50,000+ Art Supplies | Your Art Superstore (greatart.co.uk)
The process of marbling is a pretty easy one, fill your container with water and add as many or as little drops of different coloured inks into the water. Use the rod to swirl the paints around, as seen in the photo below;

You then dip your object at an angle into the water turning it so to cover the entire object and create a swirling effect on the object. Before you take the item out of the water clear the excess ink from the top of the water so to avoid a double inking.
You can of course repeat this as many times as you like but I would recommend that two is more than enough before the object becomes over saturated.
A good tip; Marabu also have a clear ink in the range, this is great to use if you want to show some of the base colours. I find it allows gaps in what can be quite dense and allows the ombre below to show through.
For best results make sure you use water that is slightly warmer than room temperature, if the water is too cold the paint will dry on contact to water, whereas if the water is warm the paint will stay wet, but not for too long. Make sure you dip your object quick quickly after laying the inks in the water.
The inks do take around 8 hours to dry so make sure you allow them to dry overnight. This also allows for any excess water to evaporate so you are ready for varnishing, if you choose to do so.
I varnish all of the objects I paint, which is really more for protection than for look, however there is something really appealing about a high gloss varnish which makes the object look a lot more finished and professional.
I use the Molotow Belton Clear coat available in the link below;
It’s great because you can really layer it up and obtain a really thick coat with minimum effort.
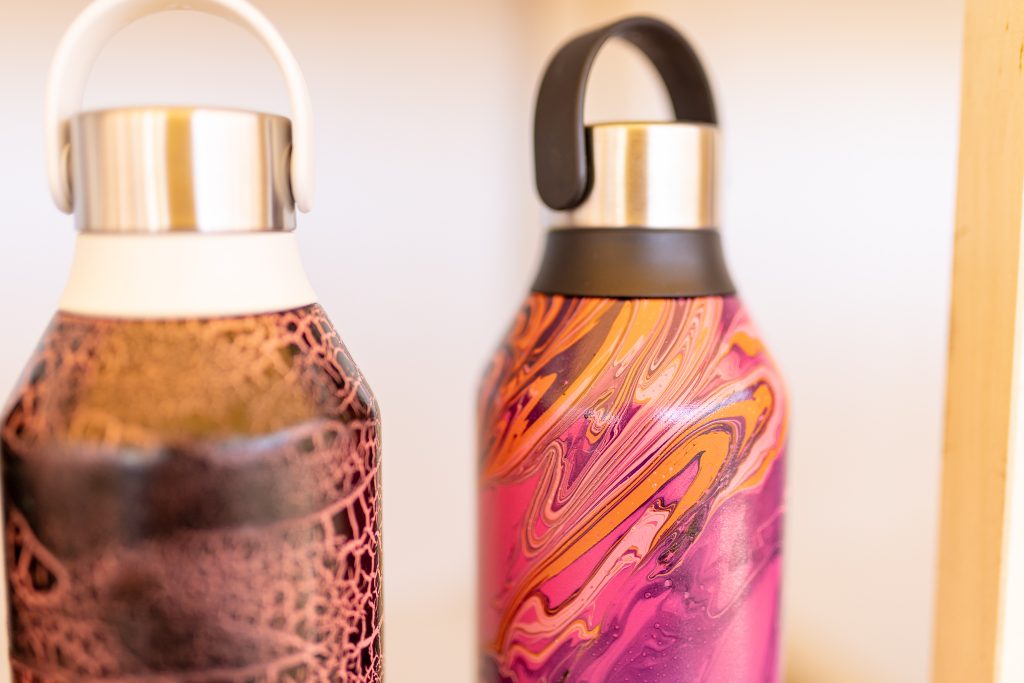
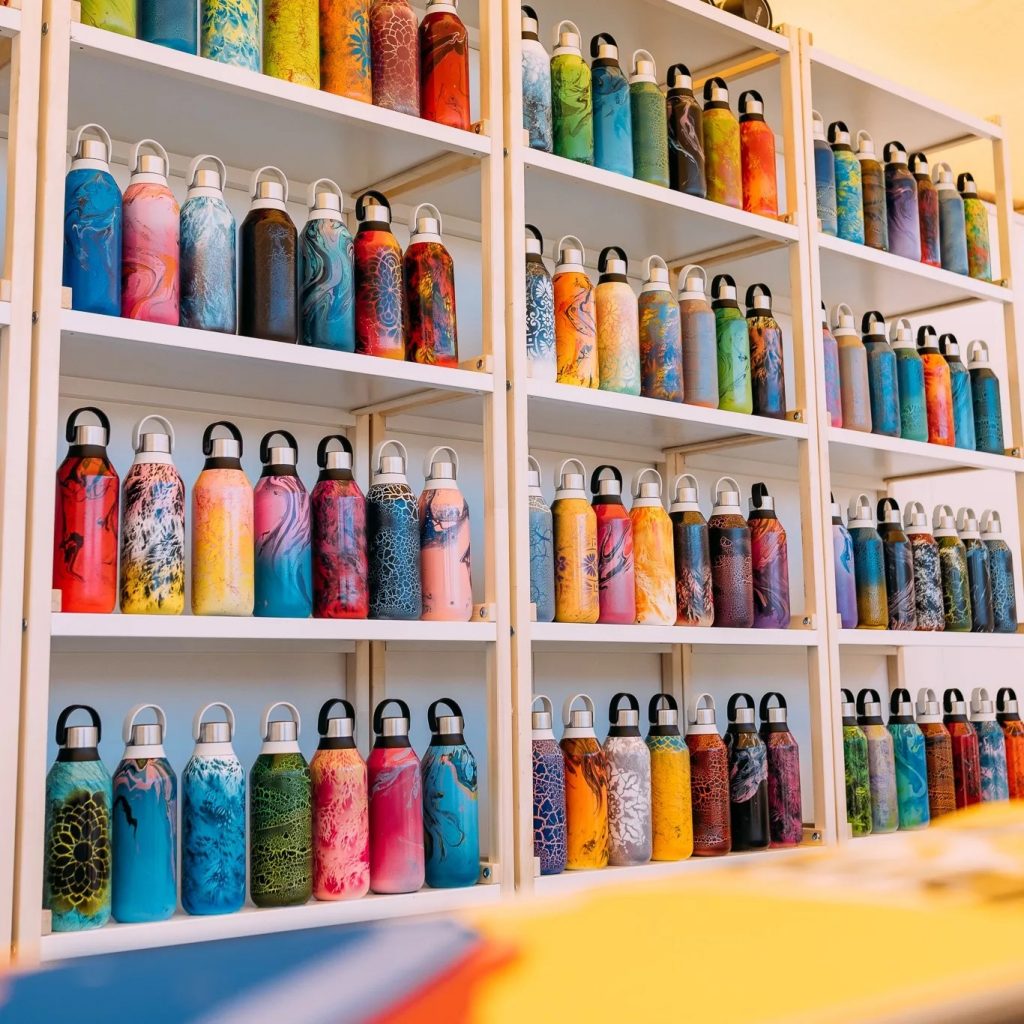
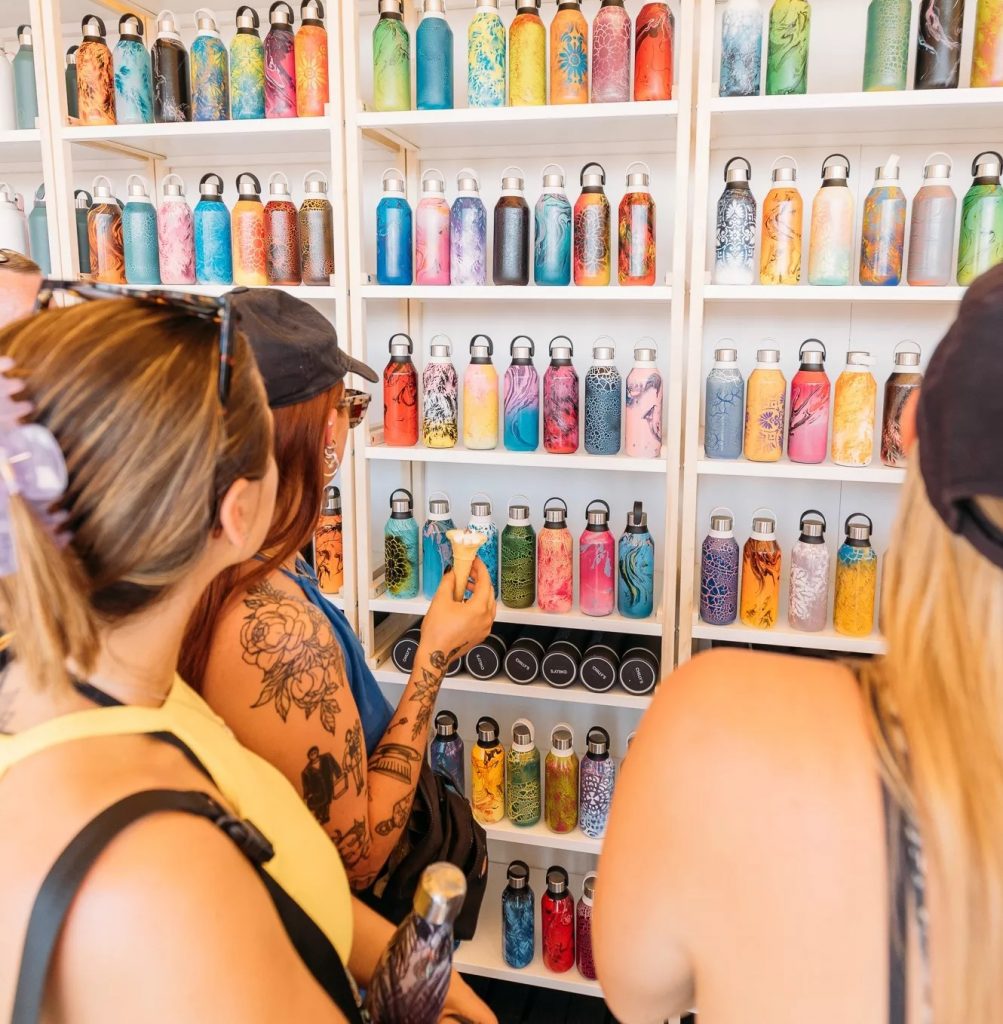
Below are some photos of the finished stand at Glastonbury Festival, I hope you like the end result;
Thank you to GreatArt for the help with the materials and to my wonderful boss for allowing me to partake in such a wonderful adventure.
If you are interested in seeing any more of my work, you can find me on Instagram @dickydoesdrawing
Some of the photos here are taken by Dan Vaughan; Instagram @lostboardshorts


Add comment