
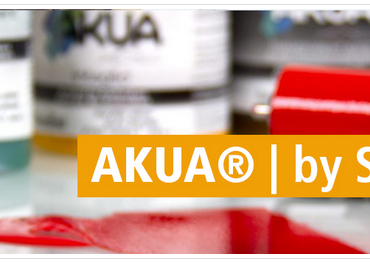
EXTRA FINE™ gouache by DANIEL SMITH – Jelmer tests it out for you!

DANIEL SMITH Extra Fine™ GOUACHE is an artist-quality professional water-based paint that provides an opaque, matte finish. Made with the same high-quality pigments and gum arabic as DANIEL SMITH Extra Fine™ watercolours, GOUACHE is uniquely formulated with higher pigment loads to achieve density and coverage without the addition of white or other fillers.
Jelmer – from SWAAK 1892, our sister store in Utrect in Holland, tries it out for you. Read on for his review!
This is what you need…

- DANIEL SMITH | Gouache: Cobalt blue, Pyrrol red, Permanent green, Hansa yellow light, Titanium white
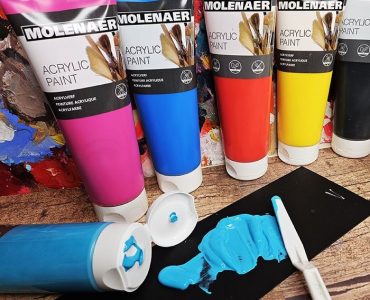
- Gerstaecker | STUDIO ACRYL Acrylic paint
- Clairefontaine | GOLDLINE® AQUAPAD watercolour paper(300 g/m²)
- Faber-Castell | Albrecht Dürer-Watercolour pencils
- Brushes; both flat and round, I used the ones below:
- Washi masking tape
- water
And this is how it works…

Surface and sketch
A beautiful painting on paper starts with the right paper. For this painting, I used 300 g/m² watercolour paper with a fine grain. The grain of the paper is a personal choice, but the most important thing is to make sure that the paper is suitable for watercolours and can take a lot of water.
After you choose the paper and size you want to get started with, it’s time to glue on the paper. I glued the paper on with a masking tape that has as little glue in it as possible
After you have chosen the paper and size you want to get started with, it’s time to glue on the paper. I stuck the paper on with a masking tape that has as little glue in it as possible so that when you remove it you don’t damage your paper. As a background for the painting, I used an acrylic paint thinned with water. I chose a yellow colour to match the end result I had in mind. Acrylic is permanent after drying unlike gouache and is therefore better suited as an undercoat.
Over my prepped surface I drew a simple sketch to have a clear composition for myself. For this I used a watercolour pencil.

Colour Distribution and Shading
After the undercoat is dry and you’ve put your sketch on paper, you can get started with the gouache. The sequence essentially works like any other paint. You work from thin to thick. That is, the first layers of paint always contain more water than your final layers. Daniel Smith uses the very strongest pigments for the Cobalt Blue and Pyrrol Red, which I used for the painting. As a result, you need very little paint to get enough colour on your paper.
In the first layer I always try to make sure that it is clear to myself where I want each colour to be and where any shadows are. As you can see, in this layer I divided my composition into areas of colour and filled them in with the gouache. I gave the shadows, which are on and under the pieces of the orange, a cooler shade. I use my large brushes in this layer because in this layer you don’t work on the details yet. That comes later.

Opaque layers
Once you have placed the first layer of gouache and it is dry you can start working a little more on the shapes and lines in your work. For this layer I use the medium brushes. Keep in mind that a new wet layer can activate the gouache from the previous layer. To avoid this, make sure the paint has a light creamy consistency. Above all, remember that you are still “building” and don’t have to focus very much on details yet. So, this also means that you are still not working with pure gouache.
I now mix more different colours than in the previous layer. With this I give more depth to the painting. At the end of this layer, the idea is that your work is already broadly in place. All your colour areas, both light and dark are in the right place. Let this layer also dry again before continuing with the next layer.

Details
In your last layer you start working on the details. For this I use the smallest brushes. Also, in this layer you do not start working with pure paint yet. You actually save this until the very last stage of finishing the layer. If you have found the right consistency, which is again just a little thicker than in the previous layer, these last layers are fun to work on. Especially with Daniel Smith’s gouache. The paint is extremely consistent and very colourful. This ensures that you need very little of the paint to get the desired effect.
When you are happy with your work you can put down the very last highlights with pure white gouache. In my painting, for example, you can see this on the top of the orange, where I added little white dots for the texture of the peel.
My final verdict on Daniel Smith’s gouache is very positive. I like that you need so little paint to get nice opaque areas, this way you can paint for a long time with your tubes. I also like that you can get started with so few colours and create a complete painting, this also makes it a fun medium to try!
Did you also get started with gouache as a result of this BLOG post? Then share it on social media and tag our account @greatart_uk

Don’t want to miss out on all our new articles? And stay up to date with all the ins & outs? Of all the discount offers, workshops Q&As? Are you curious about how others work? And interested in hands-on tips & tricks? In technical info & background articles?
Then read our free MAGAZINE, subscribe to our NEWSLETTER, read our BLOGs and follow us on social media!
© 2023 – text: Jelmer & editors Gerstaecker NL | © 2023 – image: DANIEL SMITH, Jelmer & editors Gerstaecker NL


Add comment