

Amylee’s Simple Brush Organiser
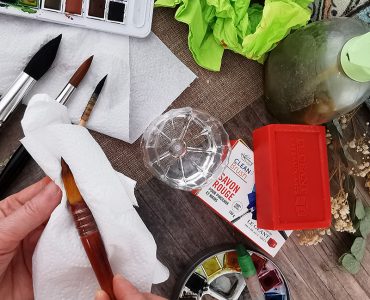
Because jars often spill, because they are not always wide or tall enough or just because we want to create our own unique storage units for the studio, I give you an easy idea to store almost 140 brushes at once.
A DIY display which does not require nails, screws or glue but only a little folding and sewing! Are you interested in that idea? No problem, here we go:
|||START | The Brush Holder
Full Material List
- 1 Metal Modelling Mesh (wide 25cm or 10inch)
- Wire spool
- 1 Cutting Pliers
- Scissors
- White Cotton Weaving Thread
- Scotch Transparent Tape
- Paper Sheets and Black Permanent Marker
- Plastic Ruler
- Bubble Wrap Roll
- Protective Gloves to protect sensitive hands (the mesh is very sharp, be careful)

||| STEP 1 | The Brush Holder – The Armature
The Tools:
- 1 Metal Modelling Mesh (wide 25cm – 10inch)
- Wire spool
- 1 Cutting Pliers
- Plastic Ruler and Black Permanent Marker
- Protective Gloves (OPTIONAL)
The Folding:
Unroll 75cm of the metal mesh (or 29 inch)+ 5cm or 2” on either side. As shown in the above photo, you need to bend the strip into 4 rectangles (25/15cmx 4 or 10’’/6”x 4).
Use the black marker to indicate the measures on the metal mesh, and fold it to form 4 rectangles (25x15cm or 10’’x6”). Do not forget to keep 5cm (or 2”) lost-edges at the 2 ends of the strip. These lost-edges are used as closure later. (Check out the picture ABCD above).
TIPS: To fold the metal mesh, use a plastic ruler as shown in the above picture.
Place the metal mesh under the ruler to hold firmly and with the second hand fold the mesh along over the top of the ruler.
The Fixing:
After folding the four sections, fold one of the lost-edges over and inwards to create a finished edge (image below). Bend the other edge at a 90° angle.
Fix the two lost-edges together with wire (picture below).
TIPS: #1 – To fold and flatten the metal mesh, place the plastic ruler on top and press firmly with your hands.
#2 – Plan to use the rectangle with the attachment edge as the back and then the fixing will be hidden.
||| STEP 2 | The Brush Holder – Closing the Sides
The Tools:
- 1 Metal Modelling Mesh (wide 25cm – 10inch)
- Wire spool
- 1 Cutting Pliers
- Paper Sheets and Black Permanent Marker
- Scissors and Plastic Ruler
- Protective Gloves (OPTIONAL)
The Folding:
Cut 2 squares of the mesh about 25cm wide (or 10 inch).
Use a sheet of paper to create a template: 1 square (15x15cm or 6”x6”).
The paper template helps you to position the ruler when folding the square-mesh (image above). On each square, you must have all lost-edges completely turned inwards.
||| STEP 3 | The Brush Holder – Anti-slip bottom
The Tools:
- Paper Sheets and Black Permanent Marker
- Scissors and Plastic Ruler
- Bubble Wrap Roll
- Scotch Transparent Tape and Protecting Gloves (OPTIONAL)
The Cutting:
Use a paper-template to create a rectangular shape (25x15cm or 10”x6”), it’s very useful for cutting the bubble wrap.
After, put the paper-template on to of the bubble wrap, and with scissors cut a rectangle following the paper shape. Nice, you’ve made your rectangle-bubble wrap shape (size: 25x15cm or 10”x6”)
Put the rectangle of the bubble wrap into the bottom of your brush holder. If necessary, hold it with a bit of tape.
The Folding:
Cut 25cm of metal mesh to make a 25x15cm rectangular shape.
Take the rectangular paper-template. Re-use the same way as above for creating the square-mesh.
Use plastic ruler to fold and flatten the 2 lost-edges completely and after put the rectangular-mesh on top of the bubble wrap already placed in the brush holder.
The Mounting:
Use the wire to attach the bubble wrap (picture A1) and rectangular-mesh (picture A2) to the bottom of the brush holder armature.
||| STEP 4 | The Brush Holder – A little bit of sewing
The Tools:
- Scissors
- 2 long White Cotton Weaving Thread (about 2m or 78inch)
- Scotch Transparent Tape
- The metal mesh armature
- 2 square-mesh
TIPS: Cut a length of string first of about 2m (or 78 inches).
To help you insert the string into the mesh, we can make a needle with the tape.
Wrap the tape around one end of the string and roll it between your fingers to stiffen (Picture below).
The Mounting:
Take the string with the needle tip and start sewing at the bottom of the brush holders. Then, continue to sew the mesh along the sides of the square. Finish with a knot.
Remember to cut the remaining string and sew the other square-mesh frame in the same way.
The purpose of this STEP is to close the sides and make the final construction rigid.
There we are, that’s it!
||| STEP 5 | The Brush Holder – The Result
The Storage:
You can now use the holes in the mesh to hold brushes as you plant flowers. This display has the capacity to keep nearly 140 brushes! It’s great, I love it!
TIPS: Store longer brushes behind and short ones in front for a simple way to select and see all your brushes.
Information for this article was provided by professional fine artist, Amylee Paris. You can visit her colourful portfolio or follow her on Facebook and Instagram.
Find all Amylee’s posts published in GreatArt online Magazine by clicking here!
GreatArt – your art superstore
Art supplies, ideas and advice for all techniques.
GreatArt offers you art supplies for all techniques from:
- traditional fine art painting,
- drawing,
- sculpture,
- printmaking,
- graphic art,
- illustration,
- airbrushing,
- model making…
We offer an extensive range of stretched canvas and display products for exhibition, all the art supplies required to create your own bespoke canvases, as well as custom framing and mounting services from GreatArt Store. You’ll also find hundreds of articles and tutorials to browse in the online magazine.


Add comment